Pages

About Me

My photo
Bethlehem, New Hampshire, United States
E-mail contact: randonneur8@yahoo.com | Facebook: facebook.com/1HappyHikerNH

Text Above Search Box

SEARCH MY BLOG USING TEXT BOX SEEN BELOW:

31 July 2011

Black Mountain (Jackson, NH): A Raspberry-Covered Peak

Black Mountain is a sprawling mass that resides between Perkins Notch (to the north) and the outskirts of Jackson, NH (to the south).  One of its southern peaks (2,757 ft elevation) can be reached by hiking trail, and there are views from there.  The hiking trail to Black Mountain's northernmost peak (3,304 ft) was abandoned many decades ago.  So nowadays, this peak is visited only by those who bushwhack to it.  However, I haven't seen much posted on the Internet about these adventures.  Maybe, I've just looked in all the wrong places?!

This past Sunday (31-Jul-2011), I decided to trek up to this peak and have a look around since I'd heard that there were some views from there.   I realize that an adventure such as this will have limited appeal (much as did my recent bushwhacking trek to Sandwich Dome in Waterville Valley).  Regardless, presented below is the story about my bushwhack to Black Mountain's 3,304 ft peak.

My day got off to a late start, as often happens with me.  However, in this particular case, it might have worked to my benefit!   Just as I was approaching the junction of Rts 302 and 16, I saw a steam-powered locomotive moving down the tracks.  Never did I expect to see this train which I'd just recently read about in the newspaper.  This was a special outing for the steam engine #7470.  It was pulling a train from North Conway to Hazens (just outside of Whitefield).   No steam-powered train had made this particular journey since 1953.   By the time I was able to pull off the road and dig my camera out of my backpack, I could only get one snapshot.  Shown below is my one and only photo of the train as it steamed by.

Okay, enough about the special train!  Let's continue now with the narrative about my Black Mountain adventure.  I'd toyed with several different routes, but finally decided upon the route shown in the map below.  The round-trip was about 7 miles.

From a technical standpoint, it was an easy bushwhack.  It was simply a matter of following a gentle grade for about 1.7 miles to the top of the mountain.   However, I'm still undecided if it was the best route, especially at this time of year when the underbrush is in full leaf.   I like to see where I'm placing my feet when bushwhacking.  For large segments of this trek, the thick underbrush made it difficult to see where I was stepping.   My progress was slow in those areas, which was frustrating.

Conditions along my course of travel ranged from areas of slash (resulting from past logging operations), to areas thick with hobble bush, to rather nice areas consisting of fern and white birch.

The next photo is a collage which shows some of the conditions encountered along the way.

I'd heard that the top of this 3,304 ft peak was covered with low-growing vegetation with very few tall trees to obstruct the views.   As it turns out, the low-growing plants consisted almost entirely of prickly raspberry bushes!   And laying beneath them was a copious number of downed tree trunks and limbs of every shape and size.   David Govatski (retired Forest Ranger) informed me that "the trees along this ridgeline are likely being subjected to wind disturbance accentuated by shallow soils and possibly affected to some degree by air pollution weakening the trees."

Exploring the summit area was made very tedious by this combination of downed trees underfoot, and the prickly raspberry bushes that were waist-high!  It's difficult to get a true perspective of conditions such as these from a photograph.  Nonetheless, shown below is a collage of snapshots showing various scenes from the raspberry fields atop Black Mountain.

Even though it was a bit difficult to move about from place to place on the summit, I considered it to be a small price to pay for the views that were experienced.   Particularly impressive to me was the view of the Carter Notch which is shown in the next photo.

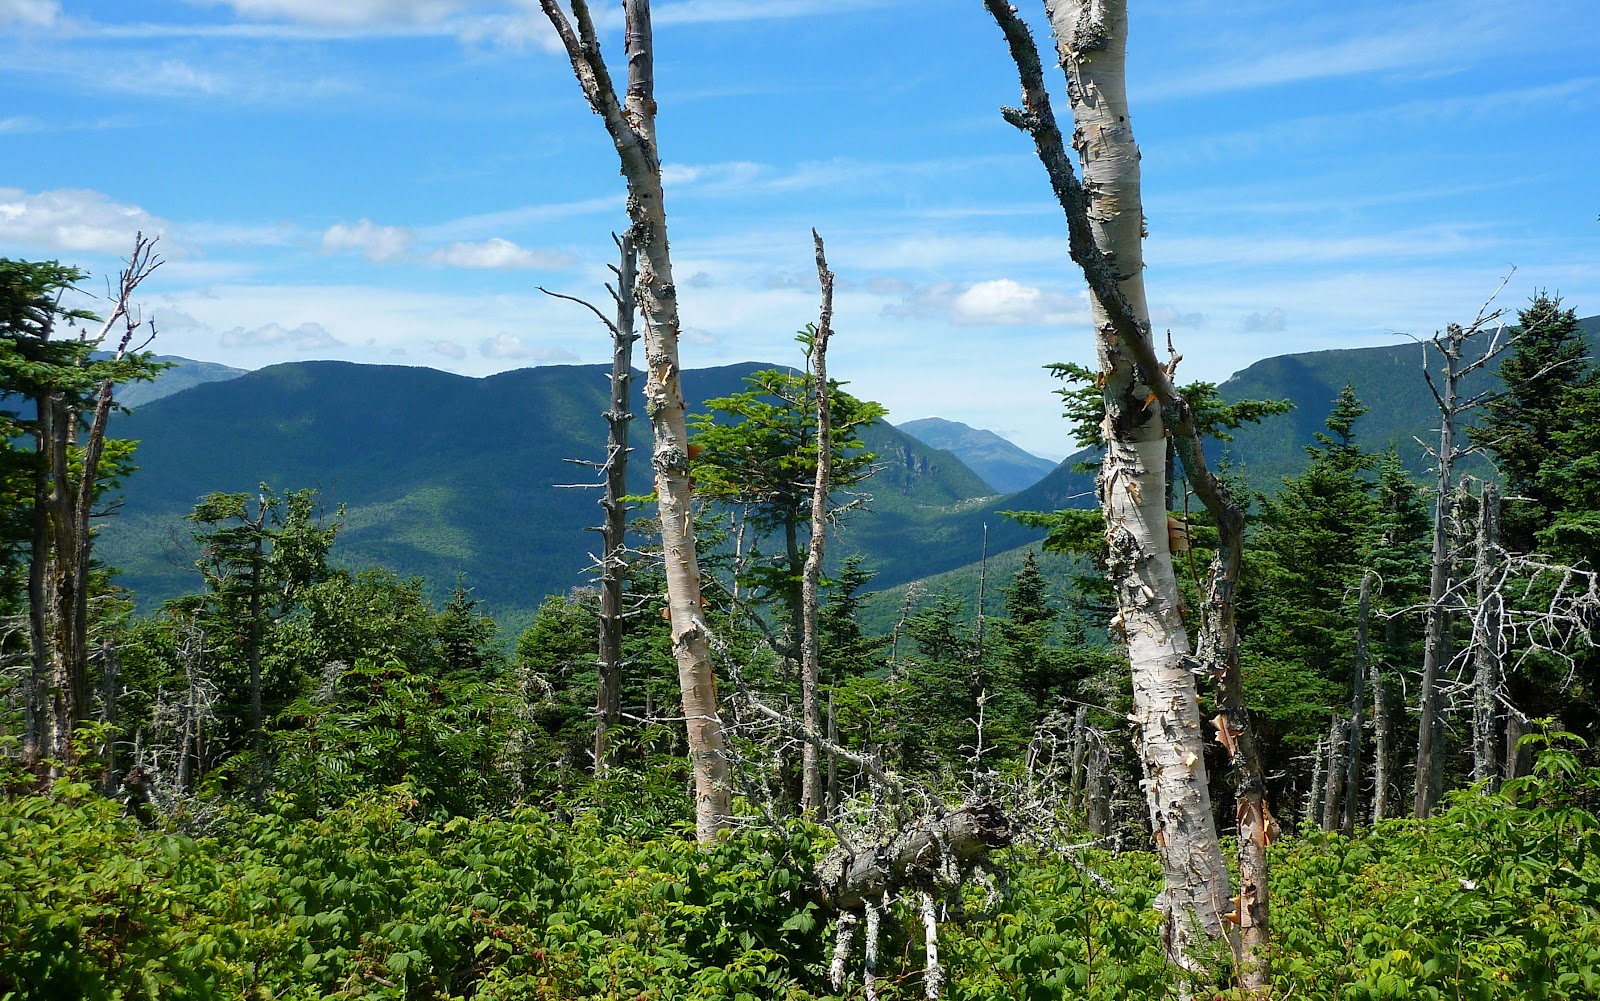
Shown below is a highly-zoomed look at the Carter Notch.

The view toward the Presidential Range was also pretty nice.  The next photo shows one angle on that particular view.

The next photo shows a zoomed photo of the Mt. Washington summit.

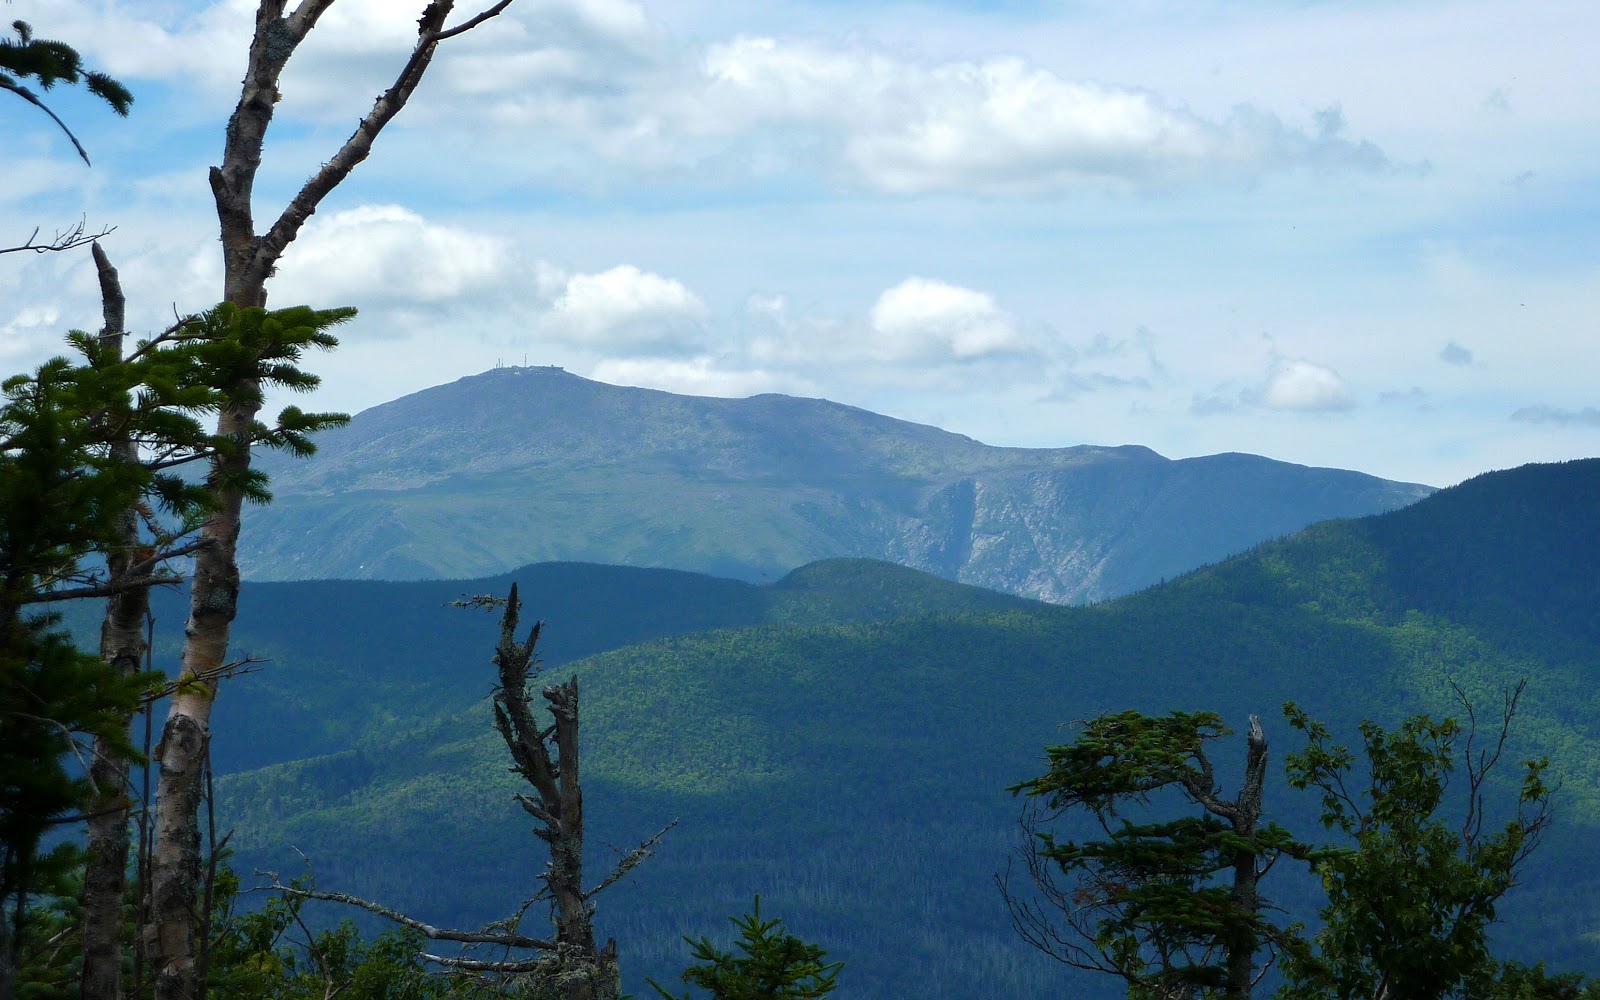
The next photo is a vista that encompasses the Presidentials, the Wildcats, and Carter Notch.

Besides the impressive vistas of the Carter Notch, and the Presidentals, there are other outstanding views to the southeast, but the tall mountain peaks are way off in the distance.   The next photo shows one such vista.  And, it also shows a large bird that just happened to be flying by with something in its beak.  (If you click on the photo to enlarge it, you can barely see the image of this bird as it passes by a puffy white cloud near the top-center of the picture.)

As was done for the Carter Notch, and for the Presidential Range, I also took several zoom shots of the high peaks off in the distance to the southeast.   The next photo is a collage of some of those zoom shots.   Seen here are the silhouettes of many familiar peaks such as the Tripyramids, Mts. Chocorua, Osceola, Carrigain, etc.

There is also a view of the Doubleheads from this location (photo below).  And I can't help but feel that there is probably a view toward the Baldfaces.  However, I quite honestly forgot about trying to find such a view.  And even if I had remembered, I'm uncertain if I would've been willing to wade any further through the raspberry bushes and downed trees!

Doubleheads:

To sum it up,  the summit of this mountain was one of the more unique spots that I've visited.   During my travels, I've experienced many fine views from mountaintops located above tree-line, and from ledges, cliffs,  and from the shores of various lakes and ponds.  However, this was the first time that I've ever had such terrific views from a raspberry field!

28 July 2011

Sandwich Dome: Killing Two Birds with One Stone


No actual birds were killed or harmed during a recent trek to Sandwich Dome on 28-July-2011.  However, I was able to accomplish two goals with this one hike.
On previous treks, I've hiked the Algonquin Trail from its trailhead on Sandwich Notch Road to the junction of the Black Mountain Pond Trail.  And, I've hiked the Smarts Brook Trail from the trailhead on Rt. 49, but only to the junction with the Yellow Jacket XC Ski Trail.  And so, one of my goals was to complete those un-hiked segments of the Algonquin and the Smarts Brook trail.
My second goal was to do a one-mile bushwhack eastward from the Smarts Brook to link up with the Algonquin Trail.  Not only would this facilitate a hike along the sections of trail that I had not previously hiked, but it would also enable me to do a loop-hike that would include a visit to Sandwich Dome.  I've thought about doing this bushwhack for awhile.  It seems like such a natural place for a trail.  However, I've not come across any reference to a trail ever having been at this particular location, other than an old trail that once went in a different direction (nearly due south to Atwood Pond).
Shown below is a map that displays the entire route I followed.  The overall journey was about 11 miles round-trip. 

Along the first 1.5 miles of the Smarts Brook Trail, there are a couple of interesting features (see photo below).  There is a cascade where folks enjoy cooling off during warm summer days.  On this particular day, there was a father and son taking a dip.  And just a short distance from the cascade, there is a little beaver pond which requires a short off-trail excursion if you want to visit it.  From the west end of the pond there's a view of Black Mountain.

Once I reached a spot about a half mile from the boundary of the Sandwich Range Wilderness, I left the Smarts Brook Trail and began the one-mile bushwack in an easterly direction along the corridor of an unnamed brook.  For the first tenth of a mile or so there was hobble bush and saplings which were annoying.  However, the vast majority of the bushwhack was through open woods which made for quick and easy going.
Open-Woods Bushwhacking:

It took an hour (1 hr 6 min, to be precise!) of bushwhacking to reach the Algonquin Trail at a point just a bit south of Black Mountain.  The Algonquin Trail actually has spots that are more rugged than anything I encountered during my bushwhack!  There are a number of rock scrambles such as shown in the next photo.  It's sometimes difficult to relate to where a trail is located in a photo, and so I superimposed a yellow line to show the track that the trail follows.
One of the rock scrambles on Algonquin Trail:

If nothing else, the Algonquin Trail is certainly a very scenic route to Sandwich Dome. Shown below are a series of snapshots taken from various points along this trail.
Black Mountain on left; ledges of Welch-Dickey Mountains on right:

Ledges of Welch-Dickey on left; ledges of Acteon Ridge on right:

Looking southward toward New Hampshire's Lake District:

Ledges of Acteon Ridge on left; Jennings Peak (pointed peak) on right:

Waterville Valley Ski Area on the eastern slopes of Mt. Tecumseh:

Okay, after thoroughly enjoying views such as shown in the snapshots above, I came to a spot along the Algonquin Trail where I could see my objective, i.e. Sandwich Dome mountain (see photo below).  From the point where I took this photo, the trail makes a short, steep descent, and then begins the final climb to the top of Sandwich Dome.  This approach route was new to me.  My previous visits to this mountain have been via the more traditional routes that include the Drakes Brook Trail, and the Sandwich Mountain Trail.  
Sandwich Dome on the horizon:

Sandwich Dome is just a few feet shy of being one of New Hampshire's 4,000 ft mountains.  Some maps list it as 3,980 ft, and others list it at 3,993 ft.  Regardless, it's a popular mountain to climb since there are remarkable northward views which include the Presidential Range, the Osceolas, Tripyramids, Mt. Carrigain, and many others.  A quick search of the Internet will produce a plethora of outstanding photos taken from Sandwich Dome.  Shown in the collage below are some of the snapshots I took during my visit, and they serve to show a few representative scenes from this mountaintop.
Collage of scenes from Sandwich Dome:

Steve Smith's blog contains an excellent description of a hike he did to Sandwich Dome in June 2010.  His report is full of interesting details, along with numerous photos.  Click HERE to access his report.
After soaking in the terrific views from Sandwich Dome, it was time to begin the 5.7 mile return-leg of my journey (0.6 mile on Sandwich Mountain Trail + 5.1 miles on Smarts Brook Trail).  I was uncertain as to what to expect, and how long it would take.

Well, I was in for a very pleasant surprise!  The Smarts Brook Trail has a gentle grade throughout, and with just a few small exceptions,  the treadway is smooth and pleasurable for hiking.   Owing to these excellent conditions, I was able to make the 5.7 mile descent in just over 2 hours.  And, within 3 hours of leaving the top of Sandwich Dome, I was sitting at home enjoying a post-hike beverage!

Shown below are some representative scenes from upper end of the Smarts Brook Trail.

Besides being a terrific trail for quick and easy trekking, there was some picturesque trailside scenery along the Smarts Brook Trail to keep me entertained.  Mind you, all of the scenery is indeed trailside.  There are no distant vistas of mountains and lakes.  The next photo illustrates the type of woodland scenes I'm talking about.

Also, I came across some small cascades along the Smarts Brook Trail at a point that was roughly about 4 miles from the trailhead.  The reason I know the approximate distance is that I saw these cascades just a few minutes after passing the sign shown in the next photo.  This sign might be the lone survivor of a bygone era!  I kept a watchful eye, but never did see any similar milepost signs along this trail.

Anyway, one of the cascades that I came across was multi-tiered, which I thought was sort of unique.  It was located slightly off trail, and there was no beaten path leading to it.  So perhaps it is seldom visited?  This cascade is shown in the next photo, and I totally realize it's difficult to get any sense of perspective from this snapshot.  I'd guesstimate that the height for the individual tiers ranges from only about 4 to 8 feet.  Sometimes, things of beauty come in small packages!

To sum it up,  hopefully this report will be of some interest to the 20 or so folks who usually read my Blog.   I don't post all of my adventures since they are either too mundane, or simply too boring to be of interest to even the most avid of followers!  Regardless, since this adventure had some unique aspects, it was considered to be "blog-worthy"!     


23 July 2011

Grafton Notch; Umbagog Lake; Wentworth Location: Cool hikes for hot days!

This past Saturday (23-July) was one of those rare hot days in northern New England.   As a way to beat the heat, my wife and I decided to do a road trip in the comfort of our air conditioned car.   However, to still enjoy the great outdoors , we stopped at various points along the way in order to do a few short hikes that didn't require much in the way of prolonged exertion.

Starting  from our home in Bethlehem, NH, we traveled in a counterclockwise loop by going first to Grafton Notch, then to Umbagog Lake, and finally to the area near Wentworth Location.  The map below shows the top portion of our route.  The bottom part of our loop consisted merely of road-travel along U.S. Rt 2.  The areas where we stopped for short hikes are circled in red. (To enlarge, click on the map.)
Our first stop of the day was at Screw Auger Falls in Grafton Notch.  Like many of our stops on this particular day, this was more of a stroll than it was an actual hike.  Nonetheless, it got us outdoors, and it certainly did not detract from the beauty of this awesome  waterfall.   Also quite remarkable are the huge "potholes"  along the waterfall corridor.  It's my understanding that these were carved out about 12,000 years ago by the swirling action of glacial meltwater that was laden with sand and rock fragments.

One of the more prominent "potholes" can be seen in the lower right side of the next photo shown below.
Besides Screw Auger Falls, we stopped for several other short jaunts at various other points in Grafton Notch.  The next photo is a collage of the signage posted at these spots.   I'll let the wording on the signs tell the story.
The next photo shows Table Rock which is a prominent outcropping on the eastern wall of Grafton Notch.
My wife, like me, enjoys the great outdoors.  However,  she was extremely content to relax in a shady spot and read a novel while I did the short 2.4 mile loop over Table Rock!  The book-time for this loop is 1.75 hours.    At a leisurely pace, I was able to rejoin my wife in less than 1.5 hours.

The hike was done in a counterclockwise fashion by starting on the orange-blazed southern side of the loop.  This segment consists of many long stretches of beautifully constructed stone stair steps, particularly on the lower portion.  One example is shown in the snapshot below.
Things are a little more challenging on the upper portion as you approach the top of Table Rock.  There are some sections with wooden ladders, and some with metal rebar steps embedded in the rock.  Examples of these structures are shown in the next photo.
The ledge at the top of Table Rock is aptly named.  It is indeed flat, like a tabletop!   The next photo shows a prominent vista from here when looking southeasterly down Grafton Notch.  The pointed mountain (with ledges visible near the top) is presumably Sunday River Whitecap.
Directly across the street is Old Speck mountain (4,170 ft elevaton), which is shown in the next photo.
The northwesterly view is shown in the next photo.  It features the cliff known as "The Eyebrow" which can be traversed when hiking up to Old Speck mountain.
To complete the loop, I descended via the blue-blazed northern leg of the loop.  In my opinion, this segment is basically just a "plain-vanilla" trail with no particularly notable features worthy of mentioning.

After rejoining my wife, we jumped in the car and headed northward to Umbagog Lake, which is part of the Umbagog National Wildlife Refuge and is also a New Hampshire state park.  It lies in the towns of Errol, New Hampshire, and Upton, Maine.  This is one of the most pristine lakes in the State of New Hampshire.  The name Umbagog is said to come from the Abenaki Indian word for "shallow water".

The next photo is a combination of a view we got while strolling along a section of the lake's shoreline, plus a vista taken from a roadside viewpoint near the lake.
Our final stop of the day was at the Umbagog National Wildlife Refuge located a few miles north of Errol, NH on Rt. 16, and just east of Wentworth Location, NH. Here we hiked along the Magalloway River Trail.  This trail is only about 0.6 mile round trip.  It's an easy walk that begins on a gated road, and eventually goes through a lovely wooded area which leads to an enclosed observation platform overlooking the backwaters of the Magalloway River.

Although, the platform has great potential for being a good place to view moose, boreal birds and waterfowl, we saw none of those during our brief visit. However, we did enjoy the fabulous natural beauty of this place by gazing upon scenes such as shown in the next photo.

Even though we saw no wildlife at the Umbagog Wildlife Refuge, a bit further down the road, we were treated to the scene of a Loon family (Mama, Papa and chick) as they floated and fished on a still-water section of river.

To sum it up, this trip was a good way to keep cool on a hot day in northern New England and still enjoy the great outdoors .   As a side-benefit, this trip also provided my wife and I with the opportunity to explore some areas that were new to us.

20 July 2011

A Trek to Church Pond - Simply Divine!

Perhaps it's a bit of a hyperbole to use the term "divine" to characterize the Church Pond Loop hike.  Nonetheless, I did find it to be a pleasant experience.

I'd never done this hike, even though I've been meaning to do so for quite awhile.  It suddenly leapfrogged to the top of my list on 20-July-2011 when I only had a few hours available for hiking.  And besides, the weather was too hot and humid (for my taste) to do anything strenuous.

The entire loop is only 2.8 miles. The map shown below was extracted from a document published by the Forest Service which outlines a proposal to decommission a 1.2 segment on the east side of the loop.  Apparently, this plan was set forth since it would require extensive labor and materials to rehabilitate this badly deteriorated section.  The 1.1 mile western side of the loop would continue to be maintained. (Click on the map to enlarge.)
On the day of my hike, the two crossings of the river were pretty easy.  However, the water depth at the first crossing was about 10 inches deep.  And with no stepping stones, it was just deep enough to require wading (unless you don't mind getting your footwear wet).  Whereas the water level at the second crossing was only 2-3 inches deep, plus someone had laid down a few logs which further facilitated the short passage across the water.

Shown in the photo below are the two water crossings.
I did this loop in a clockwise fashion.  Aside from deteriorating bog bridges, the western side of the loop was in very good shape.  There was even evidence of recent trail maintenance.
However, the eastern side of the loop was in poor condition.  There were many segments of the trail that were similar to the one shown in the photo below.
Throughout the entire loop, ripe blueberries were abundant.
On the better-maintained western side of the loop, I spotted one of the more unique wildflowers, the pitcher plant.
And, I also saw what I consider as one of the more beautiful wildflowers in the Whites, the purple-fringed orchid.
Near the end of the western side of the loop is a knoll that overlooks Church Pond.  This knoll is covered with red pines.  The approach leading to the top of the knoll is picturesque (photo below).
By following one of the paths from the top of the knoll to the water's edge, you get a great view of Potash Mountain (foreground) and Mt. Passaconaway (background).
By going off-trail, you can get a spectacular view of Green's Cliff.
And, another off-trail exploit to a different spot will earn you a view of Owl's Cliff with lumpy Mt. Tremont behind it.
Okay, and now for something that isn't "divine" (as per the title of this report), but instead is rather "silly".  There was one segment on the west side of the loop where the angle of the sun was such that it cast my shadow in front of me for a tenth of a mile or so.  Everywhere  I went, there I was! With all due respect to the Beatles song entitled "Yesterday", I was reminded of the line from that song which says: "There's a shadow hanging over me".

To sum it up, this was a great little hike, and I'm very happy that I finally did it. As one final note, on the day of this hike, no insect repellant was needed.  The bugs were buzzing, but not biting!  And for certain, that was "divine"!